We have Moved

Come and visit the new site, Bumbles & Light.
Showing posts with label design. Show all posts

Hipster PDA

Posted at A Soft Place to Land DIY Day

Do you use a Hipster PDA? I have several, a few for different kitchen notes and one for craft notes. I find it easier to keep track of different projects if I have somewhere to write them all down, I like notebooks but I find myself ripping out pages when I need them and then losing them later. A Hipster PDA is a tongue-in-cheek name, it's just a few index cards held together with a clip. Really lo-tech, but I thought mine could do with a little sprucing up so I got on Photoshop and made some little front covers for them. They're only simple but I like them and they help me tell which is which at a glance without having to read it.


I'm putting them up for free download if you'd like to use them you can find the download at the bottom of this post. They're for 3x5 index cards. You will need to print them onto card stock and cut them out. Then you'll just need some index cards, a clip of some kind to keep them together and a pen. Make sure your printer scale is set to 100% when you print them otherwise they will be too small (I made that mistake as you can see from my photos and couldn't work it out, but don't worry they come out the right size at 100% scale).

There are also plenty of other resources to help you streamline your Hipster PDA, such as calendars and things like that. Check it out.


I'm going to be putting together a larger DIY planner later in the week and binding a cover for it, I'm probably going to end up using these printed titles as dividers.

My latest knitting project is almost finished, so I'll have that to show you next week and my husband who previously pooh-poohed my knitting attempts has requested a hat for my next project. He thought that my beginner knitting would be loose and uneven but has been surprised (as I have) at how well it has come out. I also need to make an Ipod cover for the Ipod touch that I got for christmas (and am completely in love with) and I wanted to make some cushions to replace our totally worn out couch cushions! I also totally need to put together a notice board for the house, I'll be able to hang my index cards on it. There are plenty of other things I need to get done.

I've got a long list!

My delicious books also arrived this morning, I can't wait to get into these! I just finished reading David Copperfield today so I'm totally ready for some more! It's something about the cold weather that makes me want to curl up with a cup of tea and a classic!


I also got a lovely, crafty Waldorf book with some great ideas for homemade toys that I'll be putting together soon. Looking forward to it!

Click here to download the hPDA title pages!

Read more...

A Makeshift Christmas: Mini Paper Wreath


I saw these beautiful paper wreaths on Living with Lindsay, fell in love with them right away. The only trouble being that I do not have a hot glue gun (I really need one, haha) and I couldn't find one of the wreath hoops anywhere (admittedly I didn't look that hard). So I came up with a plan.


You will need

Cardboard
Tape (I used electrical tape, it seemed to stick the best)
Scissors
Two circular objects to draw around, one for the inside and one for the outside.
An old book (I used Dracula, not particularly festive but the book was old and falling apart anyway. See how guilty I feel about cutting up a book, I have to try and justify it.)

My book was already old and yellowed, so I didn't need to make it look vintage. If you like you can paint the edges with brown paint or coffee stain it to make it look old.

Draw around your two circles on the cardboard and cut it out, you should now have a cardboard hoop.
Take some pages from your book and cut them into 4 pieces each for the mini wreath, or you can judge the size you need by the size of your cardboard hoop.

Fold up the pages like a fan and tape to the edges of the cardboard, the inside and outside edges. Fold them over to the other side.

On the side you've folded the pages over to, continue to tape on more pieces until you've filled the cardboard. Tape a little ribbon to the back to hang the wreath with.


You have to be careful with this, mine fell apart on me a couple of times... mostly due to toddler intervention.

For more detailed instructions, here is the original guide from Living with Lindsay. You may find it easier to follow her instructions. I'm going to make one of hers when I can get the materials.

Next on my list are paper snowflakes for Mikey's room, crocheted decorations, paper cutout garland, Finger Knitted garland, a christmas hanging jumble of decorations and some sewn, stuffed christmas shapes made from fabric scraps.

Read more...

A Makeshift Christmas: Foil Star Mobile


I'm going to be making a lot of our Christmas decorations this year. Last year we barely bothered, Mikey was only a year old so wasn't particularly interested. We put up some lights and that was about it, we didn't even get a tree.

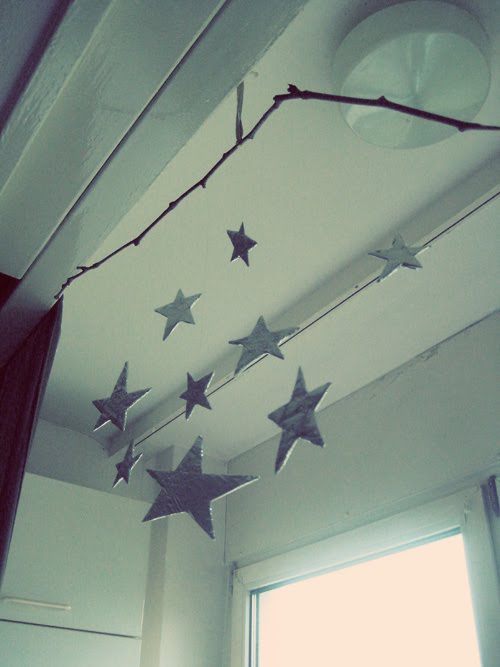
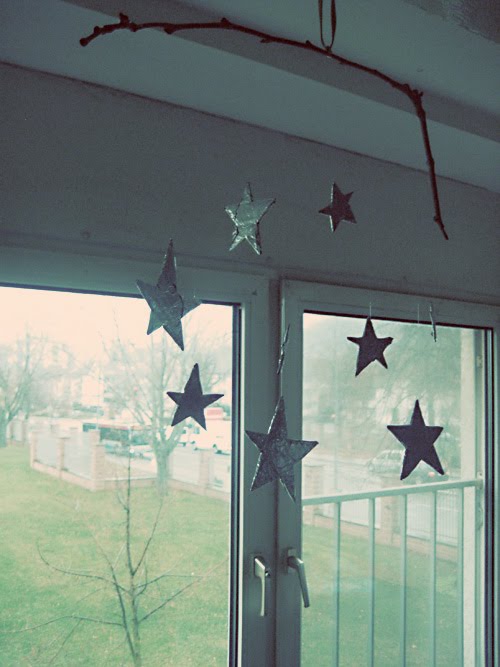
Here's the first thing that I've made, a mobile.


It's made from cardboard, kitchen foil, transparent thread and a twig from one of the trees outside. Just things that were lying around the house. Want to know how to make your own?

You will need

Cardboard, mine was from a recycled mailing box.
Kitchen foil.
Transparent thread, although you could use any kind of thread or even some ribbon or twine if you have it.
Twig, mine was about the length of my forearm.
Elmers glue.
Tape
Pencil
Scissors

Take your cardboard and roughly draw a whole lot of stars on it, they don't need to be neat and tidy unless you want them that way. Cut them out.

Spread out a sheet of foil, scrunch it up a little if you want your stars to look wrinkled. Apply glue to one side of a star and press it down onto the foil. Cut around it, leaving the foil between the points of the stars, you'll need this to fold over the edges.

Cut a line down the middle between the points of the stars. Apply glue to the side of the star legs which does not have foil and fold the spare foil over. Repeat this on the opposite side until the entire star is covered with foil. Repeat for all stars.

When your glue is dried you need to attach your stars to the twig. I tried to space them out a little so that they were different heights, but it's up to you. Tie one end of the thread to the twig and then measure (eyeball) how long you want it to be and cut. Tape the thread to one of your stars. Repeat for all stars, being careful not to tangle them.

To hang, tie a ribbon or some thread to the middle of the twig. Make sure it will hang fairly straight where you've tied it, My twig was a little heavier on one side so I had to move my ribbon along. Then you tie a loop in the ribbon and hang it somewhere!


I'm totally pleased with how mine turned out, when I got the idea I only half expected it to look good! When they're hung in a window they reflect the light beautifully.


These instructions of course aren't set in stone, play around with them and think of different ideas. You could add glitter, or instead of using a twig you could hang them on something circular. You could add silver ribbon to each star to make them look like shooting stars. Anything you want, it's your Makeshift Christmas!

If you decide to make this, let me know how it goes by leaving a comment! I'll link to all of the pictures I'm given!

Read more...

hazelnut cottage


Beautiful Jewelery and photography by Hazelnut Cottage on Etsy. Visit the shop or the blog. I may have to do some hinting to my husband, christmas is approaching after all.

Also, you can now subscribe by email or reader to this blog. Check out the links in the right sidebar.

Read more...

Mikey's room and more

I said previously that Mikey's room was finished. It seems like nothing is ever finished, I can always go back and find something else to fix. It is constantly in the state of almost being finished, but I'm pleased with how it is coming together. The only two major projects I have left is to paint his red tables blue. Not because I disike red particularly, but these tables were given to us when we first got married, they were originally pine but the people who had them before us did a very bad red stain paint job on them. I've been meaning to paint them since we first got them but kept putting it off. The smaller table is in the spare room half painted and waiting for the opportunity to go outside and finish the paint. The large table is yet to be sanded, it also needs its legs reinforced as it is a little wobbly.

Mikey's colouring table, the pictures on the wall are things he has done. This table is going to be painted blue eventually.


Bedtime cuddles and storytime chair. Music time guitar in the corner, bet the neighbours love that.


Crib, pictures on the wall are from indiefixx free art project.


Window seat. He loves to sit on here and play with his teddies.


The master bedroom is coming along. I built a new dresser yesterday, but we're in the process of sorting and throwing out old clothes and putting up some pictures on the walls so it's still a bit of a mess!

I've yet to get the husband to download his photos from the Castle Illuminations last weekend, I'll post them as soon as I get them!  I also have a couple more recipes to share with you! The husband is going TDY again next week (to Garmisch, lucky bugger) so I'll hopefully have some time to write in the evenings.

Read more...

PhotoBlog

The Therapist said I'd probably benefit from having something to "keep me on my toes". Something less introspective than a written blog, something that would bring me joy. So I've decided to start a PhotoBlog, I like taking photographs and I don't do it nearly so often as I should anymore. I'm heading into town today to find my first photograph (and to pick up some film and do a spot of retail therapy!), while Mikey is taking his nap I'll set up the blog and link it here.

I'm going to try and update it about 3 times per week. Wish me luck on my first photograph!


P.S. and THIS is a wonderful post on Simple Mom Today. It's just what I needed to read.


EDIT:

The PhotoBlog is up and running. You can get to it from the link in the sidebar or from here -

PhotoBlog

There is one photograph up there as of right now and I'm working on a second for today. I'm not too sure how tumblr (where the blog is hosted) works, so you'll have to bear with me, but it looks nifty.

Read more...

Modification and Decoration (Metamorphosis Monday)

Metamorphosis Monday Hosted by:


Finally we got some shelves to go up on the wall. So this next week I'll be fixing those up and finally finishing the livingroom, this day has been a long time coming. In fact a year, as of last Saturday I've been in Heidelberg for a year. This is the longest time I will have been in one home since I left my parents place oh so many years ago. In the past 5 years I have lived in 5 different houses in 3 different cities in 3 different countries, so it feels nice to be able to settle in for a bit.

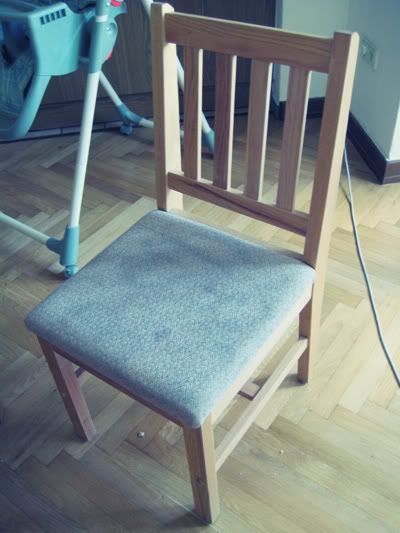
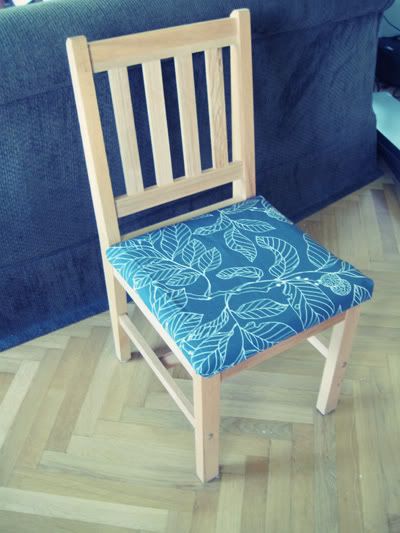
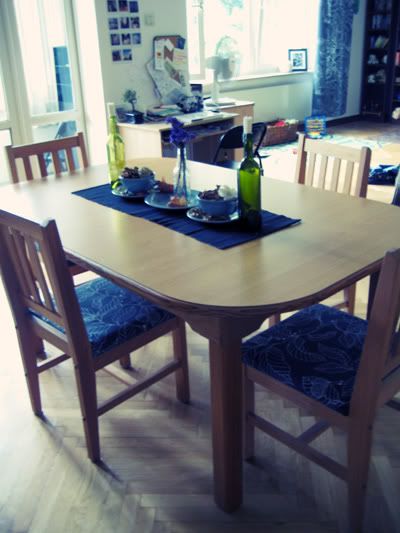
I've had the left over curtain fabric from the livingroom hanging around for a while. I finally decided to use it to cover our disgusting diningroom chairs. The chairs are borrowed (military lending closet) so I can't do anything too crazy. Hell, I'd love to strip and re-stain them too. I'll just have to be satisfied with covering the gross, stained seat fabric until we get around to buying our very own dining set. Whenever that may be. I've done a quick job on one of them so far, with just fabric and tape, I didn't want to put any holes in them again because they're not ours. Will post before and after pictures when they're all done. It was easier than I expected actually, just had to unscrew the seat, wrap it like a birthday gift and screw it back on.

I also have a nice new mirror to put up, somewhere, and a new lamp. That's as far as I've gotten on my huge list of jobs! Man I suck.

Oh, and I made a table centerpiece type thing. Wasn't on the list but I found some gorgeous teacups that are pretty perfect for it, at least for now.

Finally got around to uploading the photos!

Before:


After:


Read more...

We're still here

Wow, how did all that time go past? Things have been interesting in the household for the past week. Last Monday we visited Heidelberg Castle and got rained on. Mikey was very excited to be pushed in his stroller up the huge cobblestone hill and then even more excited to walk around on the cobblestones. He is just learning to negotiate steps and the cobblestones confused him, he thought they were steps too. Because it rained while we were there he also got to walk in the rain for the first time. He was nervous of puddles, even after me showing him he could splash in them. He pointed at the rain falling into the puddles and said "Ooooooo" which is his new word for something he thinks is interesting. Daddy took photos of us.


We've been playing outside a lot too. When we haven't been outside, Mikey has been bringing me his socks and shoes and lifting his feet for me to put them on so we can go outside. So when we're not outside I'm essentially diffusing tantrums about wanting to go outside. Poor boy thinks we're depriving him and that going outside at least twice in one day is not enough, no matter how hot it is (and it has been insanely hot). I've been reading The Happiest Toddler on the Block for some tantrum diffusing ideas. It's good, of course most of it is pseudo-science babble about how your toddler really is a cave man, but if you can get past that the main idea is great. The book can be essentially summed up by K.I.S.S. (Keep It Simple, Stupid). The idea that mid-tantrum your child is not interested in your reasoning because they "Want that now now NOW!" Understandable, I'm not particularly reasonable mid-tantrum either!

I've been using some of the ideas from the book today and I have managed to diffuse the majority of his tantrums more calmly and effectively than I had been able to previously. My problem is I'm also inclined to freak out if I don't get my way, so put us together and we're quite the pair. The book has served as good advice about how to improve myself and how I deal with his behaviour. Because let's face it, you're going to have at least some tantrums... that's how it works right? Mikey is quite spirited and liable to get frustrated easily, much like mummy.

Another book I've been reading is Creative Play for Your Baby, which I must first say is a beautiful book. I wish I had gotten it sooner. I bought the one for babies because it is for up to two year olds, I will most likely get the toddler version too. It is full of ideas for simple toys that you can make for your baby, the benefits of natural materials and imaginative play as opposed to generic plastic toys with rigid "games". Don't get me wrong, we have a ton of those too.

So I've got to get my crafty on. I have got such a huge list of projects to do, things that I put off and never get around to doing.

I am going to (in no particular order) -

1. Sand down and repaint the side table in the entrance hall. It's an ugly red and I would like to paint it white or grey... that area has no window so needs to be as light as possible. I'm also going to put on a little wooden decorative trim to fancy it up a bit, because it's quite boring.
2. Send back the world's ugliest military issue couch. In it's place I am going to re-upholster the foot rest from the chair in Mikey's room, put it there and over it with cushions.
3. Make previously mentioned cushions. I've been on about this for AGES. I've never embroidered before but it can't be that difficult, right?
4. Put up some shelves. Torn between getting a 4th bookshelf for the livingroom (yes we really have that many) or putting up some wall shelves. Raidhyn said he would prefer wallshelves because they are out of the reach of little fingers and don't have that attraction for small children who think they are mountain climbers, or are subject to bouts of biblioclasm. Not mentioning any names.
5. Make some of the toys from the previously mentioned book. There's a beautiful wall hanging with pockets for small teddies that I want to make.
6. Hang some plates. There's a spare wall right next to our kitchen area that is screaming "Pleeeeease hang plates on me!" No, really.
7. Finish the freakin' bedroom. One day. Probably in a few months(/years).

There's probably something else I've forgotten.

Read more...

blog update

I've been messing around with the code all afternoon and throwing together some graphics. I think it's finally coming together. It looks fine in firefox for me. Someone let me know if something is unusable, broken or whatever.

Read more...

I am a 24 year old British stay at home mother to a two year old boy. Married to a U.S. soldier and currently living in Germany.

I have seen the Vatican from the very top of St Peter's Basilica, the mud in the World War I trenches outside Ypres. I have walked through Montmartre side streets bustling with people in the evening, gotten lost in the streets of Greenwich Village NYC, run through cornfields on the Welsh border and sat outside with a cup of tea watching fireflies in the fields of the outer Chicago suburbs.

I have held the hands of others through addiction, fear, suicide, despair and come out the other side. I have left everything behind to begin anew.
I have fought mental illness and walked through snow in the mountains of the lake district, England. I have explored the morgue in the bowels of an abandoned hospital on a summer evening, climbed to the top of scaffolding on the outside of a five floor warehouse to look at the city lights of Nottingham at night and I have watched the sun setting on the Texas horizon.

I have held my son's tiny hand through the plastic window on an isolette in the NICU ward. Walked, speaking only in whispers, through the catacombs beneath the ground on the outskirts of Rome and seen the fireworks over Heidelberg castle.

Photobucket